Getting Started with PostgreSQL on Windows & Common PostgreSQL Mistakes

Imagine you own a large library where every book is meticulously organized on shelves. Now, what if you had to find a specific book among thousands without a proper cataloging system? It would be chaotic! This is exactly why databases exist—to efficiently store, retrieve, and manage data.
PostgreSQL, one of the most powerful open-source database systems, acts like a smart librarian, ensuring your data is well-structured and easily accessible. Whether you're a beginner stepping into database management or a developer looking to refine your SQL skills, this guide will help you get started with PostgreSQL on Windows.
We’ll also explore common mistakes that even experienced users make and how to fix them, ensuring a smoother experience in your database journey.
Common PostgreSQL Mistakes and How to Fix Them
While working with PostgreSQL, beginners often encounter errors due to syntax issues, missing privileges, or incorrect commands. Below are some common mistakes and their solutions.
1. Incorrect Database Creation Command
Wrong:
postgres=# create database company;
Issue: If another session is using the same database, you might get an error:
ERROR: database "company" is being accessed by other users.
Fix:
postgres=# drop database if exists company;
postgres=# create database company;
This ensures that the database is recreated only if it doesn’t exist.
2. Missing Superuser Privileges
Wrong:
C:\Users\alokg>psql -U alokg
Issue: If alokg doesn’t have enough privileges, it may result in
FATAL: role "alokg" does not exist.
Fix: Ensure that the correct role is assigned:
postgres=# create user alokg with superuser;
Then, log in again using:
C:\Users\alokg>psql -U alokg
3. Table Creation with Incorrect Syntax
Wrong:
company=# create table employee(
company(# eid int primary key,
company(# name varchar(40),
company(# dno int references department(dno);
Issue: The missing closing parenthesis ) results in a syntax error.
Fix:
company=# create table employee(
company(# eid int primary key,
company(# name varchar(40) not null,
company(# dno int references department(dno)
company(# );
Now that we have covered common mistakes, let's dive into setting up PostgreSQL correctly.
Getting Started with PostgreSQL on Windows
PostgreSQL is a powerful, open-source relational database management system (RDBMS) that is widely used for managing structured data efficiently. In this blog, we will cover the basic steps to get started with PostgreSQL on Windows, including connecting to the database, creating databases and tables, inserting data, querying data, and performing basic operations.
Connecting to PostgreSQL
Once PostgreSQL is installed on your Windows system, you can connect to it using the psql command-line tool. Open the command prompt and enter:
C:\Users\alokg>psql -U postgres
Password for user postgres:
Upon successful login, you will enter the PostgreSQL interactive shell as shown below:
psql (17.4)
WARNING: Console code page (437) differs from Windows code page (1252)
         8-bit characters might not work correctly. See psql reference
         page "Notes for Windows users" for details.
Type "help" for help.
Listing Databases
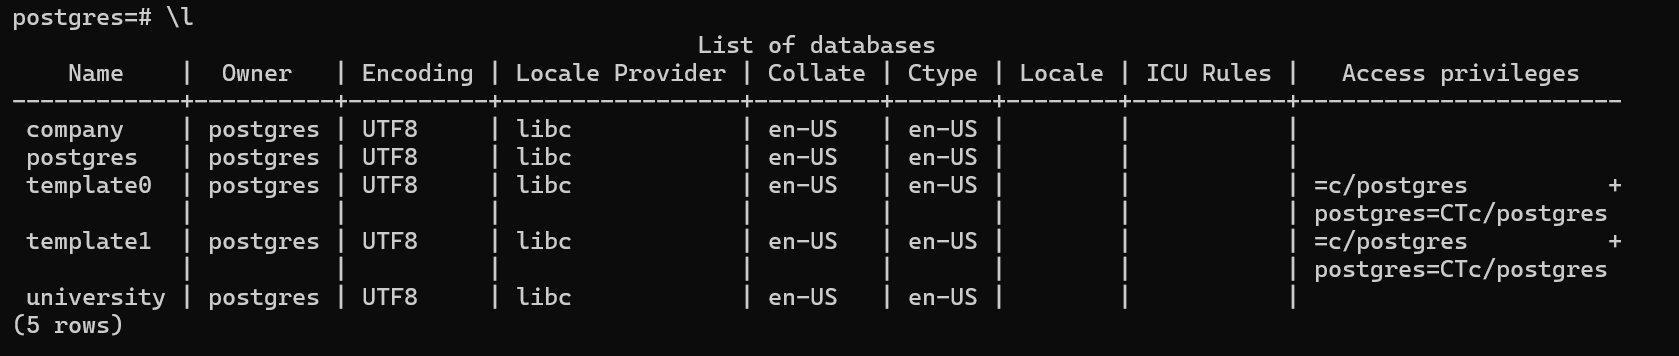
To view the available databases, use the \l command:
postgres=# \l
This will display a list of databases, including default databases such as postgres, template0, and template1 demo shown below:
Creating a New Database
To create a new database named company, run:
postgres=# create database company;
create database;
Verify its creation using \l:
postgres=# \l
Connecting to a Database
Use the \c command to connect to the company database:
postgres=# \c company;
You are now connected to database "company" as user "postgres".
Creating Tables
Let's create two tables: department and employee.
company=# create table department(
company(# dno int primary key,
company(# dname varchar(40));
create table
Check the table structure using \d department:
company=# \d department;
Next, create the employee table with a foreign key reference to the department table:
company=# create table employee(
company(# eid int primary key,
company(# name varchar(40) not null,
company(# dno int references department(dno)
company(# );
create table
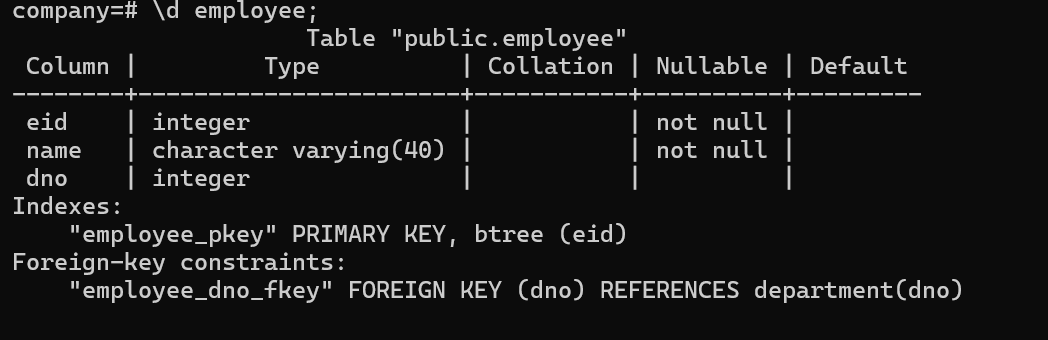
Verify the table using \d employee:
company=# \d employee;
Output:
Inserting Data
Add data to the department table:
company=# insert into department(dno, dname) values(101, 'CSE');
company=# insert into department(dno, dname) values(102, 'HR');
company=# insert into department(dno, dname) values(103, 'IT');
company=# insert into department(dno, dname) values(104, 'ME');
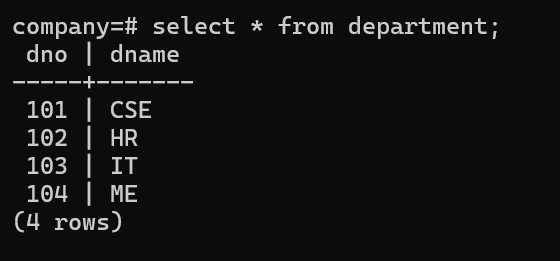
View the inserted data:
company=# select * from department;
Output:
Insert data into the employee table:
company=# insert into employee values(10, 'raj', 101);
company=# insert into employee values(20, 'paramita', 102);
company=# insert into employee values(30, 'bhaskar', 103);
company=# insert into employee values(40, 'arup', 103);
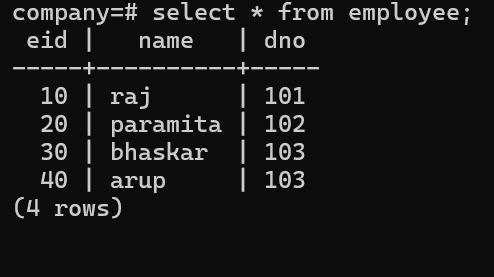
View the inserted employees:
company=# select * from employee;
Output:
Querying Data
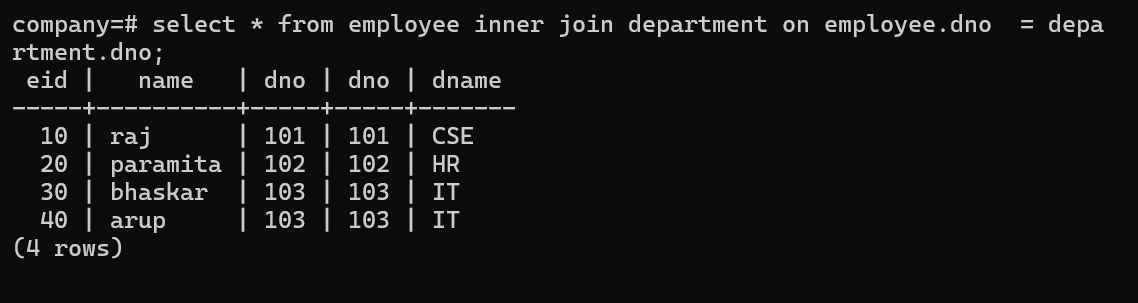
To fetch employee details along with their department names, use:
company=# select * from employee inner join department on employee.dno = department.dno;
Or using table aliases:
company=# select * from employee e inner join department d on e.dno = d.dno;
Output:
Deleting Data
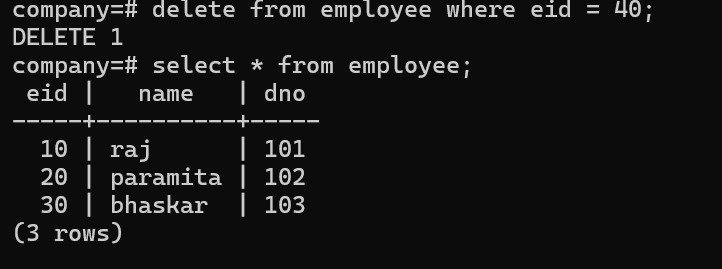
To remove an employee:
company=# delete from employee where eid = 40;
Output:
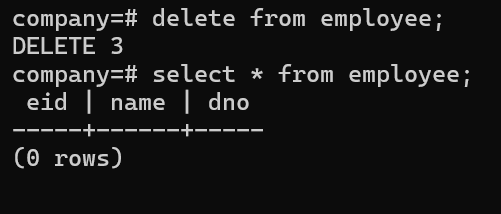
To delete all employees:
company=# delete from employee;
Output:
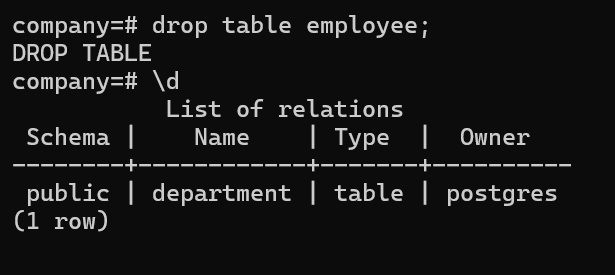
To drop a table:
company=# drop table employee;
Output:
Stay tuned for more PostgreSQL operations in the upcoming sections!
About the author
I’m an aspiring web developer keen on learning new things. I’m dedicated to keeping up to date with the latest stuffs in web development. I always lookout for chances to grow and learn. When I’m not coding, I enjoy reading about India’s fascinating history. It helps satisfy my curiosity and teaches me about the diverse India.
Comments
Join the discussionNo comments yet. Be the first to comment.